Here's what I contributed to my team.
2018-07-09
I began to print the remaining parts for the new cabin design. Once those were up and ready, I practiced with my team for our presentation. Once the parts were printed, we had three of the four printed parts available. By the time the Lulzbot finished printing, there wasn't enough filament to print another part.
2018-07-10
On this day, I used the Prusa printer to print the top part of our cabin assembly, leaving the Lulzbot TAZ available for testing with the green Octave filament. This specific spool of filament is frustrating to use, because it needs different settings than the other filament spools.
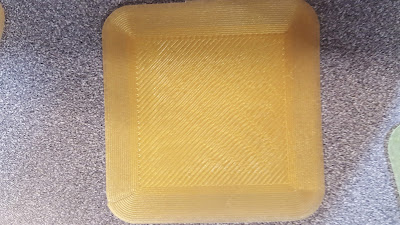
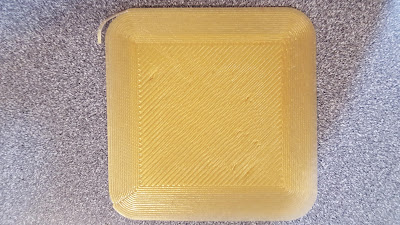
I made multiple tests trying to print the first two layers of a 50mm × 50mm sheet of plastic.
The first print with the Octave had large ripples in the first layer, which I later figured out meant that the distance between the nozzle and the print bed was too close.
 |
| First print, with Octave Green PLA |
I replaced the filament with gold and raised the extruder-to-plate distance to see if that changed anything: it did! Between prints, I raised the nozzle further and further.
 |
| Second print, with Hatchbox Gold PLA |
 |
| Third print, with Hatchbox Gold PLA |
 |
| Fourth print, with Hatchbox Gold PLA |
However, I decided to try to use the Octave filament again the next day.
2018-07-11
On this day, I finally figured out how to use the Octave filament. With the same settings before with the fourth print from the previous day, the Octave filament didn't stick and warped. This meant that there was too much distance between the print nozzle and the filament bed. In order to fix this, I changed the initial height of the first layer only using the First layer height setting in Cura. For 0.2mm layer prints, the first layer is set to 0.3 mm. I changed hat to 0.2 mm, and the print quality of the Octave filament increased dramatically.
 |
| Fifth print, with Octave Green PLA |
 |
| Our 3DBenchy, in all its glory |
Our team redid our bill of materials to include a set of size 608 bearings, because we were going to make better filament holders for both printers. The new filament holders will prevent filament under-extrusion, which is a problem that the Lulzbot has with its parts.
2018-07-12
Today, the hardware for our cabin model came, some brass screw inserts designed to fit in plastic. After putting the inserts in and assembling everything, our first cabin model was complete. Now, all we have to do is test it!
 |
| Our model (left), the 2017-18 model (center), and the legacy model (right) |


No comments:
Post a Comment